How to Set Up a Custom Domain Email for Your Newsletter
Before connecting SendFox or Kit, it helps to understand what the email settings do. Otherwise, you end up copying records into your domain settings without knowing what you just changed.
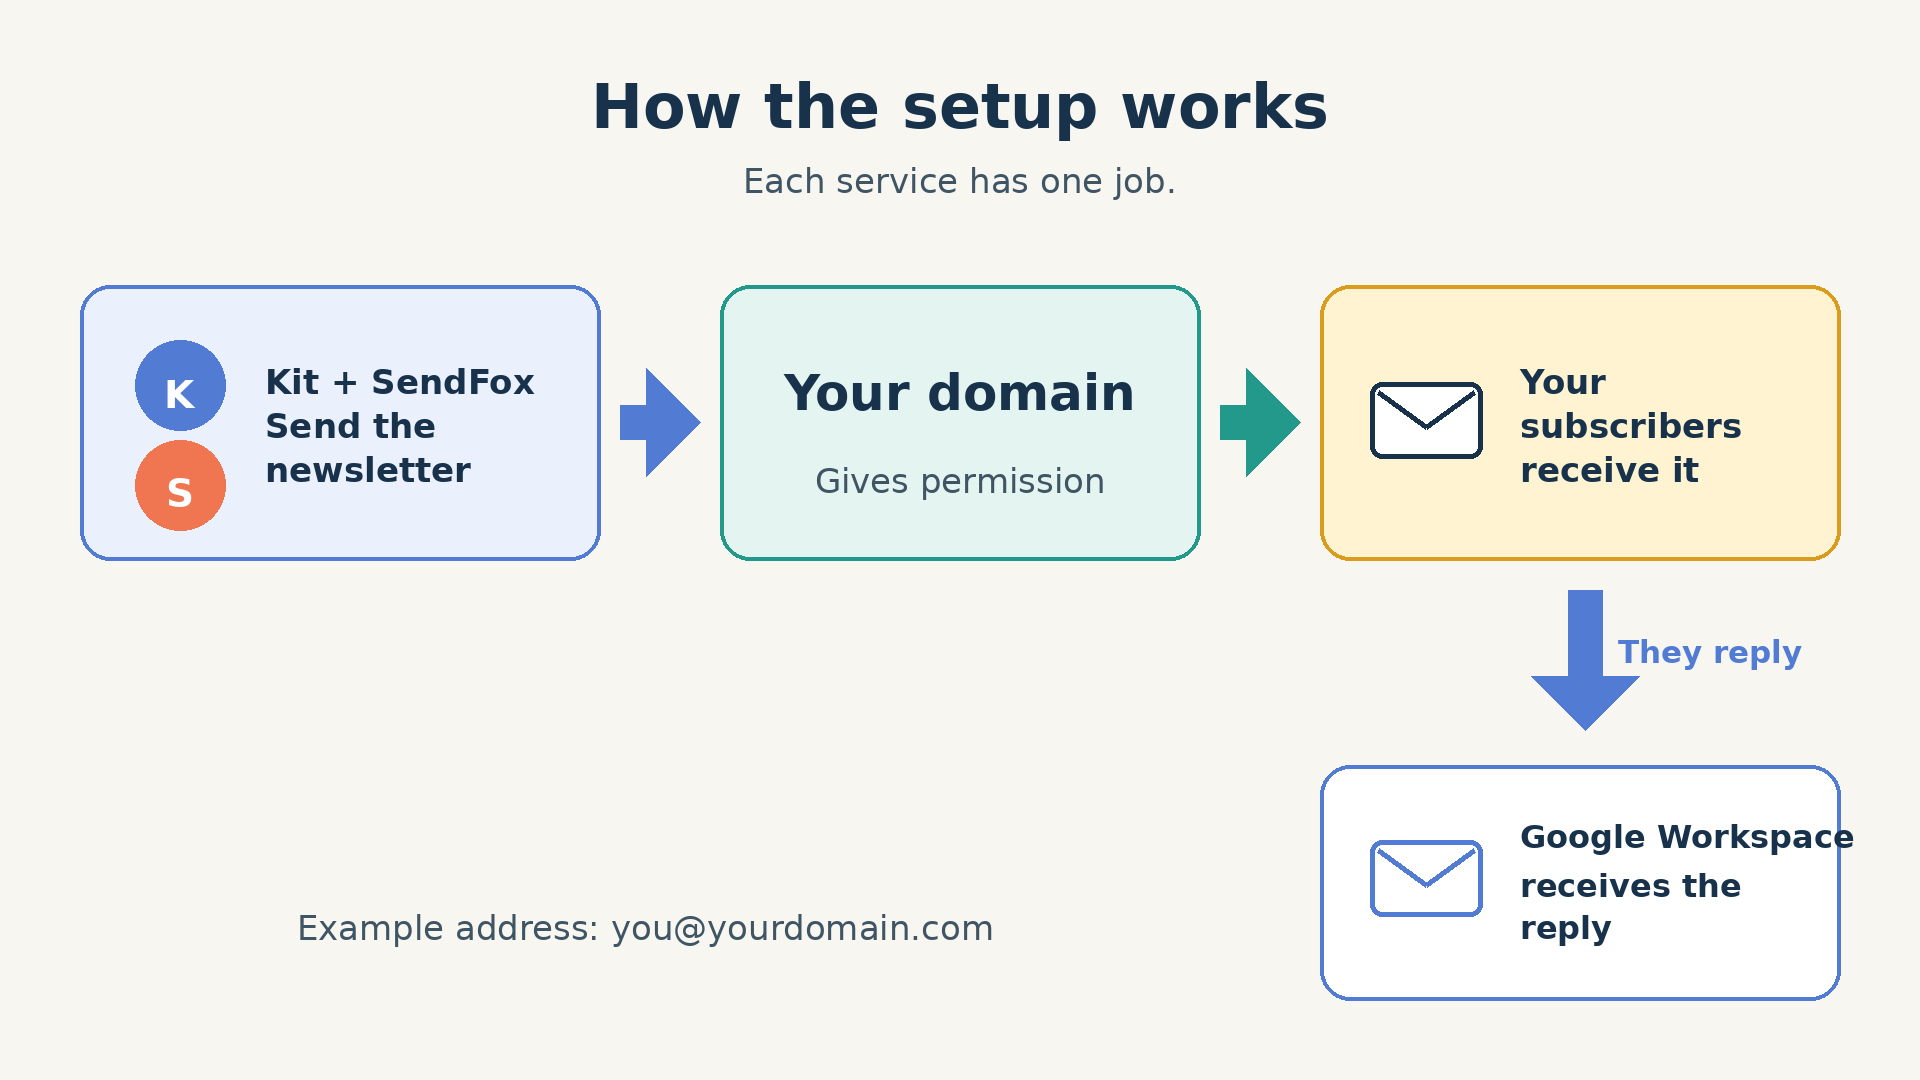
I use Google Workspace for my inbox, SendFox for automated email sequences, and Kit for newsletter broadcasts. All three use my domain, but each has its own job.
Let’s start there.
What each part is for
Your domain and email address
Your domain is the name you own, such as yourdomain.com.
Your email address combines a name with that domain, such as hello@yourdomain.com.
Owning the domain gives you control over the name. You still need an email provider to create an inbox for that address.
Your inbox
Your inbox receives email and lets you read and reply to it.
I use Google Workspace, which gives me Gmail with an address on my own domain. Another email provider can do the same job.
When someone replies to my newsletter, their message arrives here.
SendFox and Kit
SendFox and Kit send emails to your subscribers. They manage your mailing lists, unsubscribe links, campaigns and automated sequences.
A broadcast is an email you send to a selected audience at a particular time, such as your latest newsletter.
An automated sequence, also called a drip campaign, sends emails according to a trigger and schedule. For example, someone subscribes, receives a welcome email, then receives another email two days later.
I use SendFox for sequences and Kit for broadcasts. That combination helps me control costs. You can also use just one platform.
From name, From address and Reply-To address
These control what subscribers see and where their replies go.
| Setting | What it does | Example |
|---|---|---|
| From name | The sender name displayed in the inbox. | Abe |
| From address | The email address shown as the sender. | hello@yourdomain.com |
| Reply-To address | The address used when someone clicks Reply. | hello@yourdomain.com |
For this setup, use your domain inbox as both the From and Reply-To address wherever those settings are available.
DNS: where you connect the services
DNS holds the records that tell other computers how to find and use services connected to your domain.
You edit these records in your DNS manager. This may be with your domain registrar, website host or a separate DNS provider.
My DNS was managed through 10Web. Yours may be somewhere else. Use the provider managing your domain’s active nameservers.
Example: Before delivering an email to hello@yourdomain.com, the sender’s email service checks your domain’s DNS records to find out which mail server should receive it.
Where should email for yourdomain.com go?
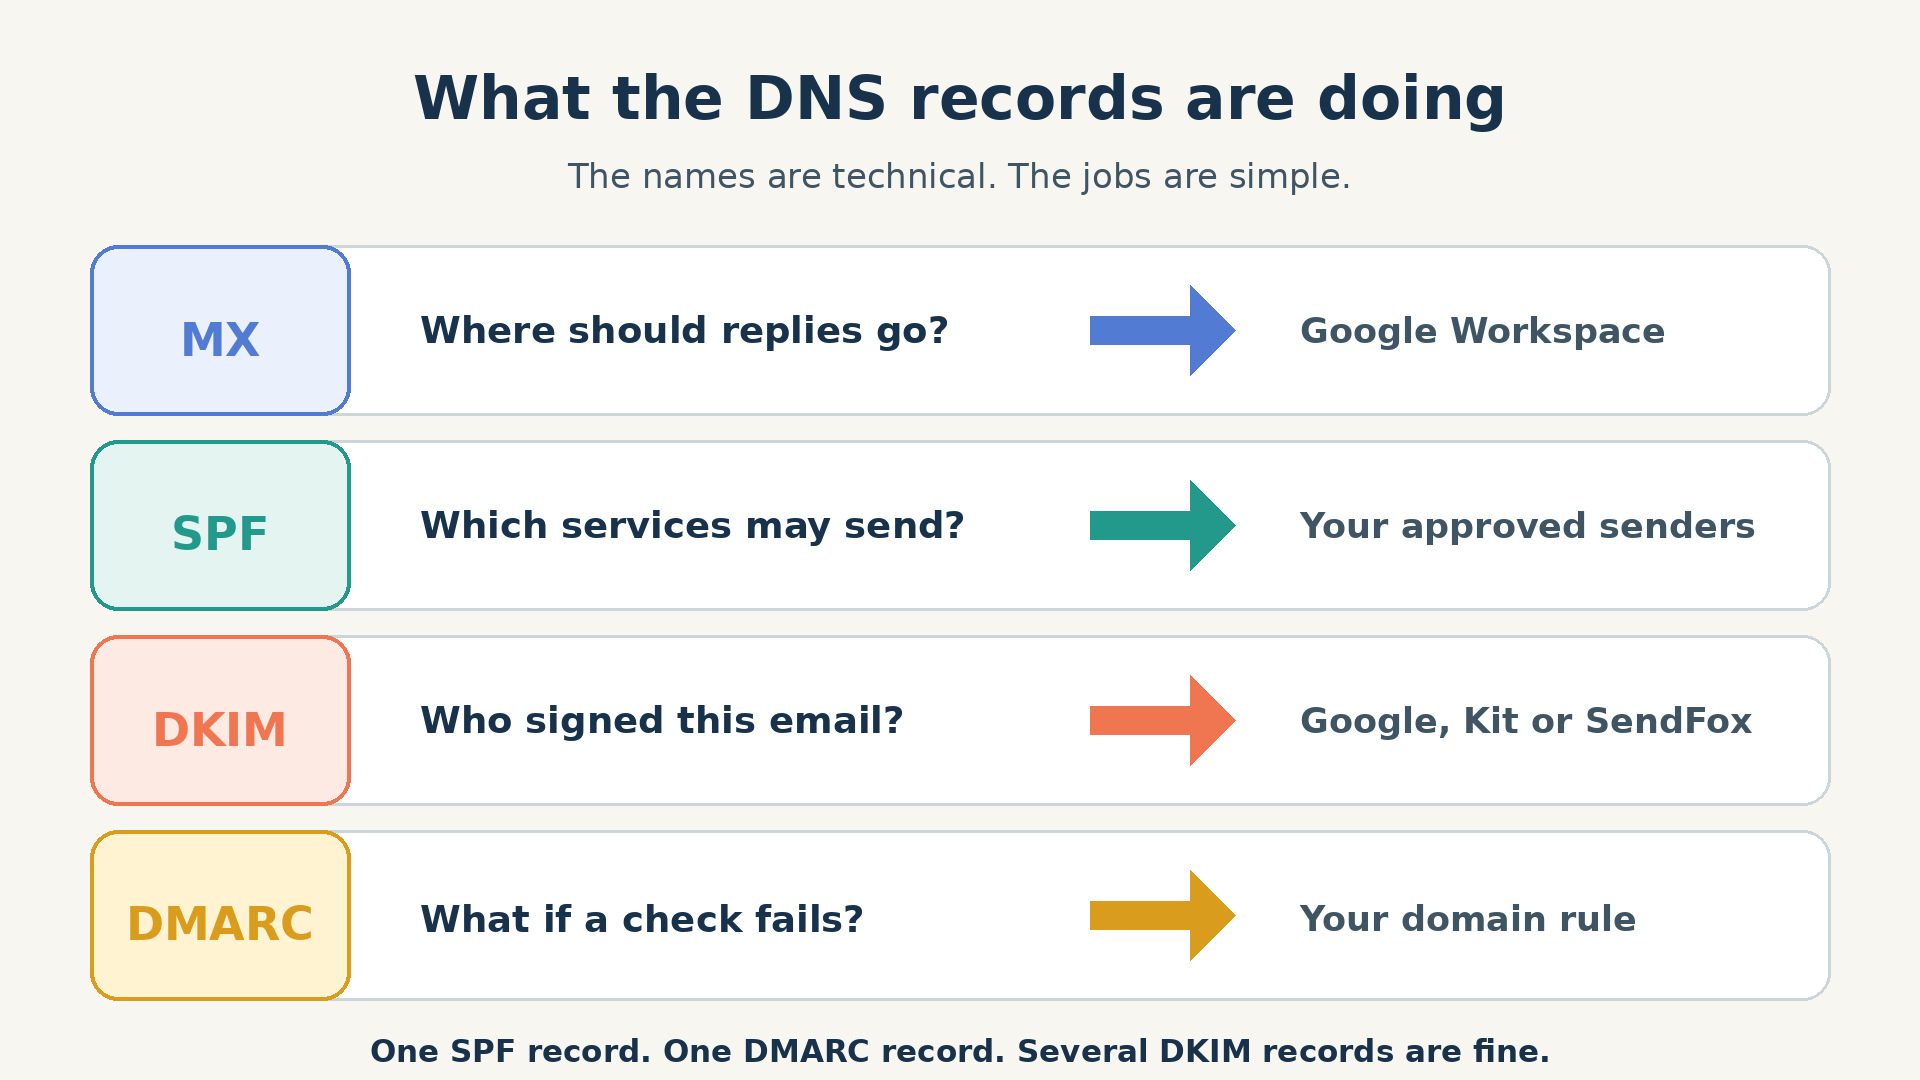
Your domain’s MX record identifies the mail server.
MX: where incoming email goes
An MX record tells other email services where to deliver messages addressed to your domain.
If Google Workspace hosts your inbox, your MX records direct incoming email to Google.
Connecting SendFox or Kit should leave your working inbox’s MX records in place. Newsletter sending and incoming email have separate settings.
Example: If you use Google Workspace, your MX record directs incoming email to Google. When a subscriber replies to hello@yourdomain.com, the reply arrives in your Google Workspace inbox.
To hello@yourdomain.com
Directs incoming email to Google
You read the reply in Google Workspace
TXT: a record that holds text
A TXT record stores a piece of text that another service can check.
Google might ask you to add a TXT record to prove that you control your domain. SPF and DMARC settings also normally use TXT records.
Think of TXT as the record format. The text inside determines its purpose.
Example: Google gives you a verification code and asks you to add it as a TXT record. Google then checks that record to confirm you control the domain.
For verifying your domain
The record contains that code
Domain ownership confirmed
CNAME: a pointer to another name
A CNAME record points one DNS name to another.
SendFox and Kit use these pointers to connect parts of your domain’s email authentication to records they manage.
You copy the names and destinations they provide. The platform handles the records at the other end.
Example: SendFox asks you to point sf._domainkey.yourdomain.com to a DNS name it provides. When an inbox provider checks a SendFox email’s DKIM signature, it follows that pointer to find the authentication key managed by SendFox.
sf._domainkey.yourdomain.com
The DNS name supplied by SendFox
Managed by SendFox and used to check the signature
SPF: which servers may send email
SPF lets a receiving email service check whether the sending server is allowed to send for the domain being checked.
There is one detail worth understanding: SPF checks a behind-the-scenes sender address, also called the Return-Path. That can differ from the From address your subscriber sees.
Keep only one SPF record at each DNS name. If an existing record needs another sending service added, update that record.
For SendFox, follow its CNAME instructions. You do not need to invent an extra SPF record or add SendFox to Google’s SPF entry.
Example: You send an email through Google Workspace. The receiving service checks the SPF record for the Return-Path domain. If that record authorizes the Google server that sent the message, the SPF check passes.
The receiving service identifies the sending server.
Does the Return-Path domain authorize this server?
The sending server is authorized for that domain.
DKIM: a signature attached to the email
DKIM adds a digital signature to outgoing email.
The receiving service checks it against a key published through DNS. This helps confirm which domain signed the message and whether the signed content changed along the way.
Google Workspace, SendFox and Kit can each have their own DKIM records on the same domain.
Example: SendFox adds a DKIM signature to your newsletter using your authenticated domain. The receiving service looks up the corresponding key through DNS and checks the signature. If the signature is valid and the signed content has not changed, DKIM passes.
A digital signature travels with the email.
It uses the matching key found through DNS.
The signed content matches what was sent.
DMARC: checking the domain subscribers see
DMARC checks whether the domain in the visible From address matches an authenticated domain from SPF or DKIM.
An email passes DMARC when at least one of those checks passes with the required domain match.
Your DMARC policy also tells receiving services how you want failures handled:
| Policy | What you are asking the receiving service to do |
|---|---|
p=none |
Apply no special treatment because of a DMARC failure. Useful while monitoring the setup. |
p=quarantine |
Treat failures as suspicious, commonly by putting them in spam. |
p=reject |
Reject messages that fail DMARC. |
Receiving services still apply their own filtering.
A starting record might look like this:
v=DMARC1; p=none; rua=mailto:dmarc@yourdomain.comHere is what each part means:
| Parameter | Purpose |
|---|---|
v=DMARC1 |
Identifies this as a DMARC record. |
p=none |
Sets the policy to monitoring without requesting quarantine or rejection. |
rua=mailto:dmarc@yourdomain.com |
Requests summary reports at this address. Use an address you have created and can access. |
Keep one DMARC record at _dmarc.yourdomain.com. For the same sending domain, Google Workspace, SendFox and Kit share that policy.
If you already have a DMARC record, review it before making changes. Avoid replacing an existing policy simply to copy this example.
Example: Your newsletter shows hello@yourdomain.com as the sender. Its DKIM signature passes and uses yourdomain.com as the signing domain. Because that matches the domain subscribers see, DMARC passes. If neither SPF nor DKIM passes with the required domain match, the receiver consults your DMARC policy.
hello@yourdomain.com
Does SPF or DKIM pass using a domain that matches the visible sender?
One passing check with the required domain match is enough.
The receiver consults your policy: none, quarantine or reject.
What to enter in the DNS fields
When a service gives you a DNS record, your DNS manager will usually ask for these fields:
| Field | What it means |
|---|---|
| Type | The kind of record, such as CNAME, TXT or MX. |
| Name or Host | Where the record belongs. @ usually means your main domain. Other names identify a particular part of it. |
| Value, Data or Target | The text or destination supplied by the service. Copy it exactly. |
| TTL | How long other systems may keep a cached copy before checking again. The default or Auto setting is usually suitable. |
| Priority | Used with MX records to indicate which mail server to try first. Lower numbers take priority. |
Some DNS managers add your domain to the Host field automatically.
For example, if SendFox supplies sf._domainkey.yourdomain.com, your DNS manager may expect only sf._domainkey.
Check the saved record. You want your domain to appear once.
Before connecting SendFox or Kit
Have these ready:
- Access to your domain’s DNS manager.
- A working inbox such as
hello@yourdomain.com. - Access to the newsletter platform you want to configure.
Send a message to your domain inbox from another email account, then reply. Confirm that both messages arrive.
If you still need an inbox, complete your email provider’s setup first. For Google Workspace, that includes verifying domain ownership, activating Gmail with Google’s MX records, and configuring Google’s outgoing email authentication. The official setup links are at the end of this guide.
The instructions below assume that inbox is working.
Set up SendFox
1. Add your sending domain
In SendFox, open Settings → Sending → Email domains.
Enter yourdomain.com, then click Add Domain. Click Validate beside the domain to see its DNS records.
2. Copy the three CNAME records
Add the three records to your DNS manager using the Host and Data values in your account.
The host names normally begin with:
sendfoxsf._domainkeysf2._domainkey
Use your own account’s destinations. Save all three records, then return to SendFox and click Validate again.
DNS updates can take up to 24 hours, so allow time if the first attempt fails.
The two _domainkey records support DKIM. SendFox’s CNAME setup handles its authentication without additional SPF or DKIM TXT records from you.
3. Set your sender address
Use your domain inbox, such as hello@yourdomain.com, as the email’s From address. Set Reply-To to that inbox too if a separate field is available.
After validation, SendFox can send using an address on your domain.
4. Test SendFox
Send an email to another inbox you control.
Check the displayed sender address, click Reply, and confirm the reply reaches your domain inbox.
Set up Kit
1. Add your sending address
Open Settings → Email → Add From Address.
Enter your sender name and domain email address. Kit sends a verification email to that inbox. Open it and verify the address.
This confirms you can access the address. Domain authentication is the next step.
2. Add a Verified Sending Domain
Under Settings → Email, find Verified Sending Domains.
Choose the option to add or set up a domain, enter yourdomain.com, and continue.
Kit offers automatic and manual setup. With automatic setup, follow the prompts to connect your DNS provider. With manual setup, copy Kit’s supplied DNS records into your DNS manager.
Keep the SendFox records you already added. Kit supplies its own records.
Return to Kit and click Validate.
3. Check DMARC
If Kit detects an existing DMARC record, keep using that record.
If your domain has none, Kit provides one to add as a TXT record. Copy its Host and Value into your DNS manager, then validate again.
You need one DMARC policy for this domain, even when both platforms send email from it.
4. Test Kit
Send an email using your verified address.
Check the sender, reply to the message, and confirm the reply reaches your domain inbox.
Test each platform separately. A successful SendFox test tells you about SendFox’s configuration; Kit needs its own check.
Check authentication before sending to your list
In Gmail, open the received message, click the three-dot message menu, and choose Show original.
Look for:
- SPF: PASS
- DKIM: PASS
- DMARC: PASS
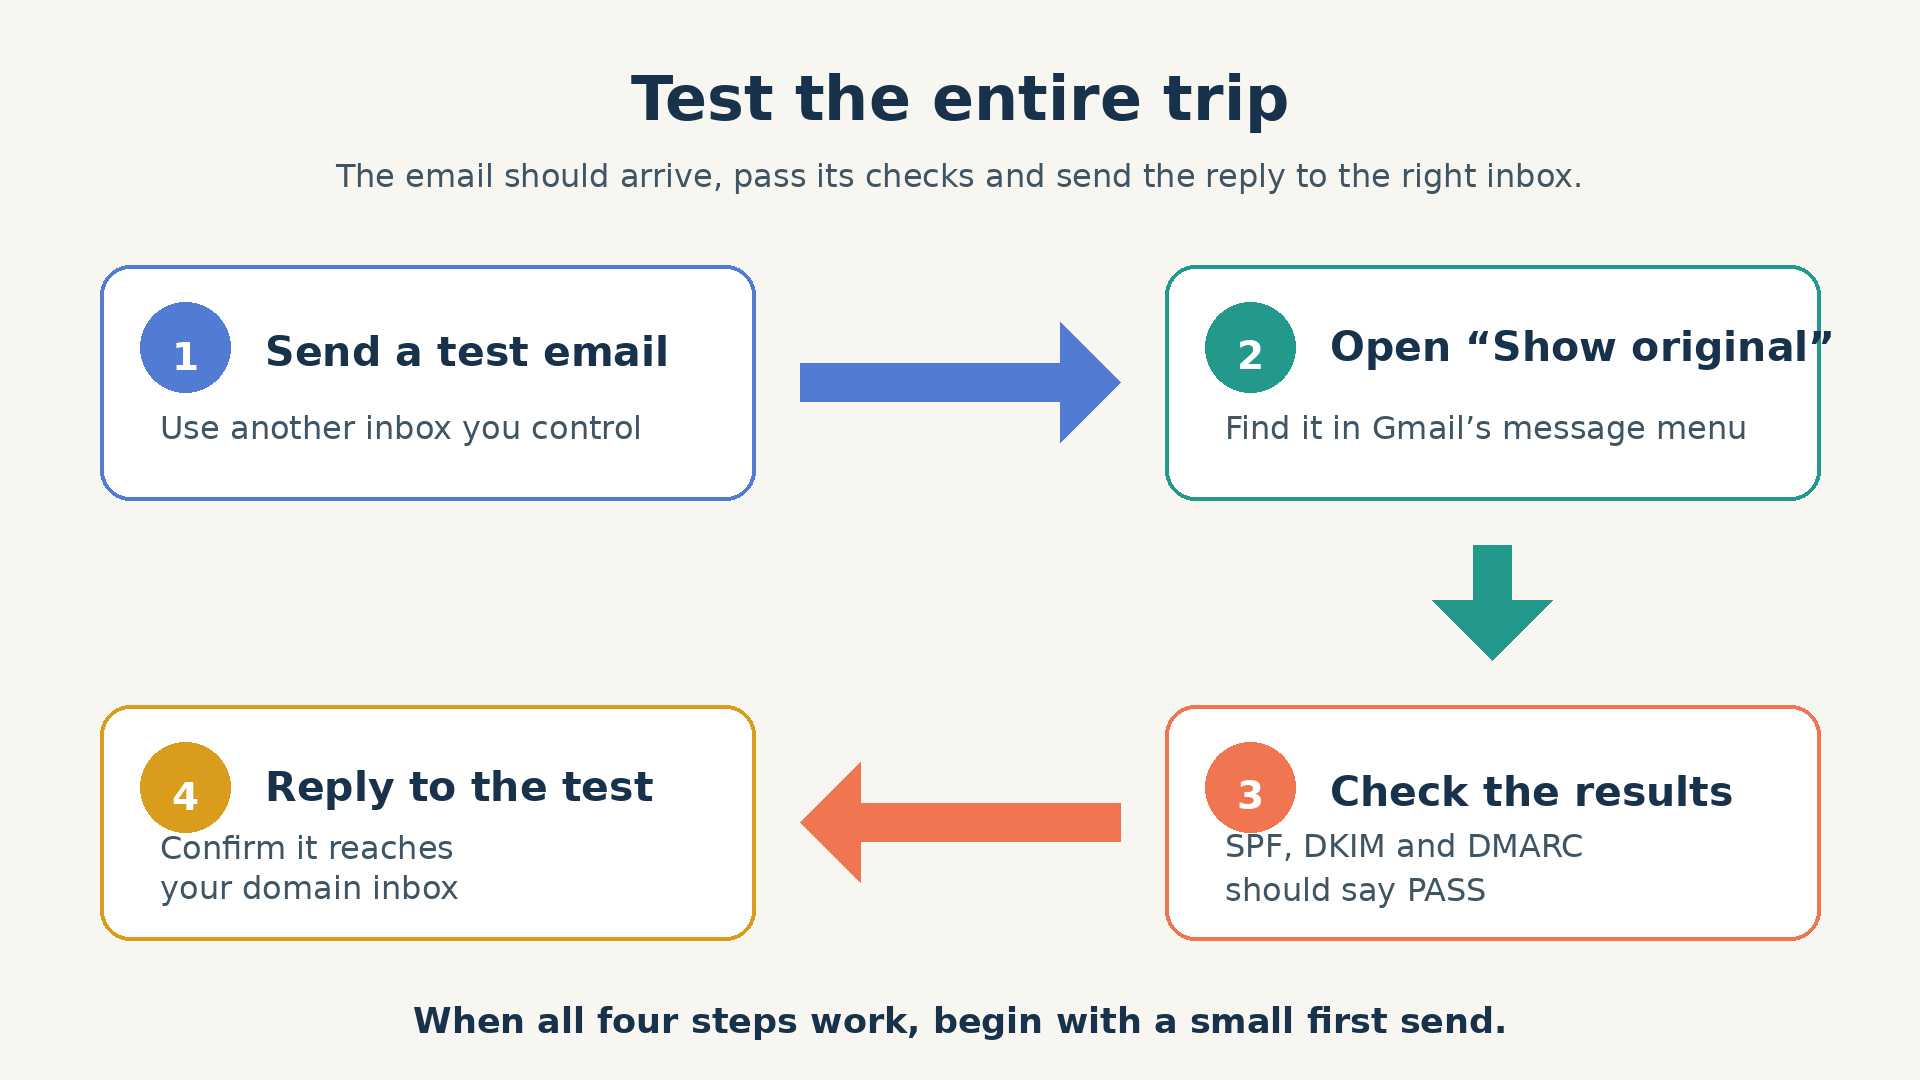
Passing these checks confirms the message authenticated successfully. Inbox placement also depends on your sending reputation, audience and content.
When changing an existing newsletter’s sending setup, begin with a smaller group of engaged subscribers and increase the audience over subsequent sends.
One final detail if you use both platforms: authenticating your domain does not synchronize your subscribers or unsubscribes. That requires a separate process or integration. Decide how you will handle it before sending campaigns from both.
My everyday setup is straightforward: SendFox sends the welcome sequence, Kit sends the newsletter, and I answer subscribers in Gmail.